Hey there! It's good to be back. Since the sick kids are finally back to school and baby is napping, it's time for mama to play. This is the time of day I so look forward to...take a little time to get done what absolutely needs to be done and take a lotta time to do what I feel like doing. So I've been working with Mod Podge for a few days and am excited to show what I've been up to. I have honestly never used Mod Podge before. So after spending some time at modpodgerocksblog.com, I felt ready to begin.
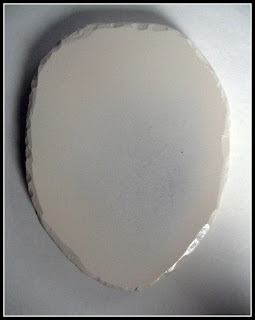
I rummaged through our scrap wood box in the basement and found just enough MDF (medium-density fiberboard) to cut out some eggs. My daughter had an Easter egg-shaped book laying around that I used to trace out some egg shapes.
I used a reciprocating saw to cut my eggs.
Even though I wasn't exactly sure what my plan was for the eggs, I knew I wanted them to look 3-dimensional and not flat. I used a cheap retracting utility knife to start chipping and scraping out chunks of fiberboard along the front and back edges of the eggs. This was probably the most time consuming part of this project. I set a waste bucket in front of me and carved away while watching Dancing with the Stars. Multitasking at its finest! In my photo you can see where I have chiseled away at the edge... nd where I haven't. There is a big potential for injury while using a knife here so please be careful.
Once you get both front and back edges of an egg chiseled and ready to go, you need to seal the edges so that paint will properly adhere to the MDF. (I tried to prime then paint the egg and it didn't work, as the paint never was able to stick to the egg on the sides). So, grab a paint brush and put that Mod Podge to work. One of its functions is to work as a sealer. Spread a medium coat of Mod Podge around the edges of the egg. I then set mine to dry on a sheet of wax paper to keep the egg from sticking. The Mod Podge dried pretty quick so I took my eggs outside to spray paint them heirloom white. It took 2 or 3 coats to get the sides well covered. Do not waste your time spraying the center of the front and backs of the eggs. These will eventually be decoupaged with scrapbook paper.
Now it's time to prepare your scrapbook paper to be decoupaged onto your egg(s). I absolutely love, love, love my paper with the birds on it. Colors are awesome and it just looks fun and spring-y to me.
Use your eggs to trace their shape onto the backside of the scrapbook paper.
Grab your scissors and cut out your paper egg. Cut towards the inside edge of your egg - maybe about 1/3" or so. Because you chiseled the edge of your MDF egg, you don't need your paper egg as wide as the entire egg. Do any trimming to the paper - you do not want any of the paper covering the edge that is chiseled. The paper should only sit on the flat front part of the egg and not wrap onto the side parts that are chiseled.
Once your paper it trimmed up, pull it off of the MDF egg. Using your paintbrush, smooth on a medium coat of Mod Podge on the front section of the egg where you want your paper to stick. Work quickly because Mod Podge dries quickly. Pick up your paper egg and mist the back of it with a spray bottle. Then lay the paper on the wet Mod Podge on your MDF egg.
Now you need to use a brayer to roll out the bubbles in between the paper and MDF egg. I don't own a brayer so I used a small lightweight plastic rolling pin. It worked just fine and actually did push out the bubbles in the paper allowing it to dry flat.The brayer (or rolling pin) also pushed out excess Mod Podge. Simply use your brush to spread the excess around the edges of your paper and MDF egg. If you notice that any of your edges aren't drying flat on your egg, lift the paper, trim a bit of paper, use your paintbrush to spread a bit of Mod Podge under the edge, lay the paper down and smooth out.
Once the paper is dry it is time to spread a medium layer of Mod Podge over the top of the paper. Use your paintbrush and work quickly just like before. I chose to decoupage both sides of my eggs. So once one side is complete, flip over and start the process over.
How much fun are these? Go make yours. Seriously. Then meet me back here tomorrow and check out what I did with mine.
I appreciate my followers. If you appreciate my projects, share my blog with a friend (or two). There is a a button on the right sidebar that allows you to share with a friend or even share with all of your friends on Facebook. If I woke up tomorrow and had a bunch of new followers, it would just make my day!
This project is linked to Show and Tell Saturdays at Be Different Act Normal and Funky Junk's Saturday Nite Special.


Love them! They are really cute!
ReplyDelete