Showing posts with label Spring. Show all posts

Thursday, March 31, 2011

Spring Decoupaged Eggs


Hey there! It's good to be back. Since the sick kids are finally back to school and baby is napping, it's time for mama to play. This is the time of day I so look forward to...take a little time to get done what absolutely needs to be done and take a lotta time to do what I feel like doing. So I've been working with Mod Podge for a few days and am excited to show what I've been up to. I have honestly never used Mod Podge before. So after spending some time at modpodgerocksblog.com, I felt ready to begin.

I rummaged through our scrap wood box in the basement and found just enough MDF (medium-density fiberboard) to cut out some eggs. My daughter had an Easter egg-shaped book laying around that I used to trace out some egg shapes. 


I used a reciprocating saw to cut my eggs.

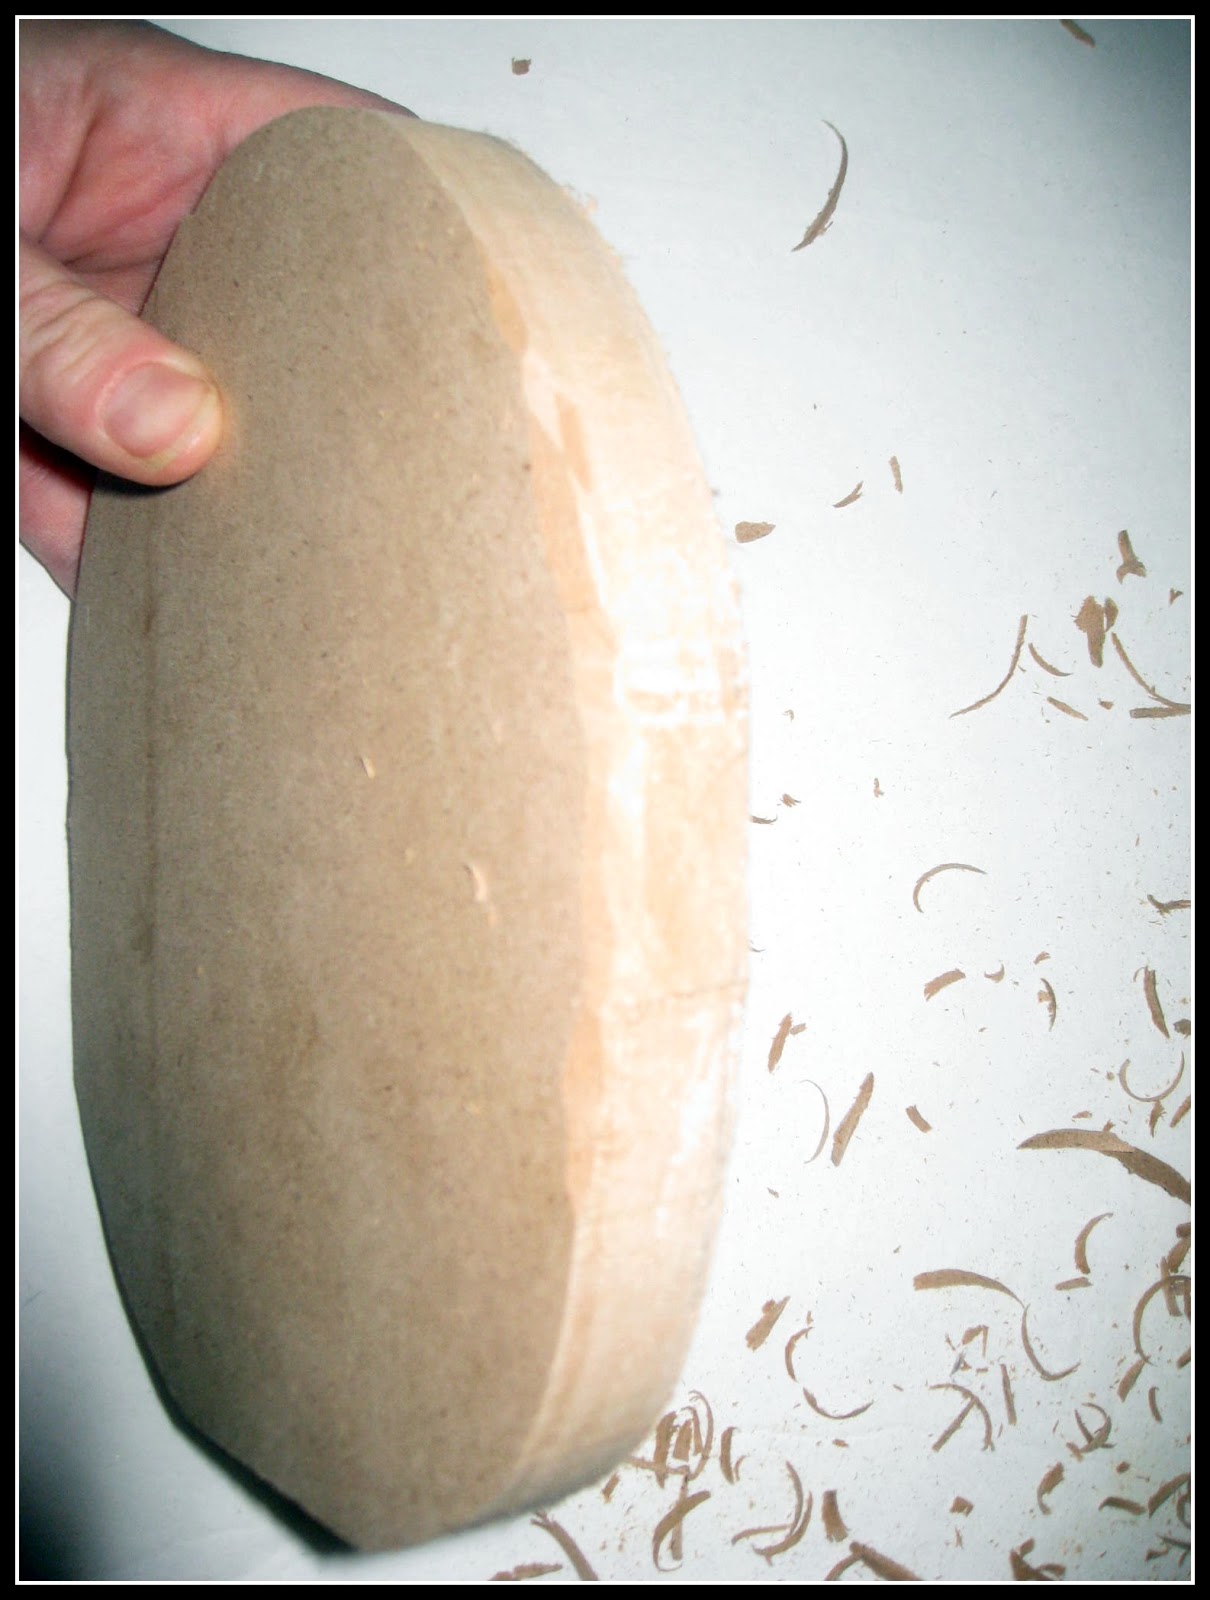
Even though I wasn't exactly sure what my plan was for the eggs, I knew I wanted them to look 3-dimensional and not flat. I used a cheap retracting utility knife to start chipping and scraping out chunks of fiberboard along the front and back edges of the eggs. This was probably the most time consuming part of this project. I set a waste bucket in front of me and carved away while watching Dancing with the Stars. Multitasking at its finest! In my photo you can see where I have chiseled away at the edge... nd where I haven't. There is a big potential for injury while using a knife here so please be careful.


Once you get both front and back edges of an egg chiseled and ready to go, you need to seal the edges so that paint will properly adhere to the MDF. (I tried to prime then paint the egg and it didn't work, as the paint never was able to stick to the egg on the sides). So, grab a paint brush and put that Mod Podge to work. One of its functions is to work as a sealer. Spread a medium coat of Mod Podge around the edges of the egg. I then set mine to dry on a sheet of wax paper to keep the egg from sticking. The Mod Podge dried pretty quick so I took my eggs outside to spray paint them heirloom white. It took 2 or 3 coats to get the sides well covered. Do not waste your time spraying the center of the front and backs of the eggs. These will eventually be decoupaged with scrapbook paper.


Now it's time to prepare your scrapbook paper to be decoupaged onto your egg(s). I absolutely love, love, love my paper with the birds on it. Colors are awesome and it just looks fun and spring-y to me.


Use your eggs to trace their shape onto the backside of the scrapbook paper.


Grab your scissors and cut out your paper egg. Cut towards the inside edge of your egg - maybe about 1/3" or so. Because you chiseled the edge of your MDF egg, you don't need your paper egg as wide as the entire egg.  Do any trimming to the paper - you do not want any of the paper covering the edge that is chiseled. The paper should only sit on the flat front part of the egg and not wrap onto the side parts that are chiseled.

Once your paper it trimmed up, pull it off of the MDF egg. Using your paintbrush, smooth on a medium coat of Mod Podge on the front section of the egg where you want your paper to stick. Work quickly because Mod Podge dries quickly. Pick up your paper egg and mist the back of it with a spray bottle. Then lay the paper on the wet Mod Podge on your MDF egg.


Now you need to use a brayer to roll out the bubbles in between the paper and MDF egg. I don't own a brayer so I used a small lightweight plastic rolling pin. It worked just fine and actually did push out the bubbles in the paper allowing it to dry flat.The brayer (or rolling pin) also pushed out excess Mod Podge. Simply use your brush to spread the excess around the edges of your paper and MDF egg. If you notice that any of your edges aren't drying flat on your egg, lift the paper, trim a bit of paper, use your paintbrush to spread a bit of Mod Podge under the edge, lay the paper down and smooth out.


Once the paper is dry it is time to spread a medium layer of Mod Podge over the top of the paper. Use your paintbrush and work quickly just like before. I chose to decoupage both sides of my eggs. So once one side is complete, flip over and start the process over.


How much fun are these? Go make yours. Seriously. Then meet me back here tomorrow and check out what I did with mine.

I appreciate my followers. If you appreciate my projects, share my blog with a friend (or two). There is a a button on the right sidebar that allows you to share with a friend or even share with all of your friends on Facebook. If I woke up tomorrow and had a bunch of new followers, it would just make my day!


This project is linked to Show and Tell Saturdays at Be Different Act Normal and Funky Junk's Saturday Nite Special.


Funky Junk's Sat Nite Special


Saturday, March 12, 2011

Needing Me Some Spring!

I am needing me some spring. Since Mother Nature isn't cooperating I decided to take matters into my own hands and start some seasonal decorating. My front door has been bare since the Valentine's Day wreath came down and it is begging for some eye candy. After rummaging through my basement I realized that apparently I don't own a spring wreath. Me not owning a spring wreath, now that just doesn't  seam right. I was actually trying to think of a fun project to do for my first blog post and this could be perfect. Everyone could use a nice springy wreath - particularly on a gray day like this. About a month ago I was visiting my friend Rachel and really took notice of her decor on a console table in the foyer right inside her front door. I just couldn't stop thinking about the robin's eggs.

See what I mean? Gorgeous. So Rachel's table is serving as my inspiration for today's project.


How To Make Robin's Eggs...I went back down my basement stairs for the second time today and grabbed some small-sized plastic Easter eggs. We have an overabundance of these eggs anyways - ever notice how they seem to multiply? First plan of action was to grab some gray primer spraypaint and give the plastic eggs a coat of it.

Since the blue I will use for the eggs is a water-based acrylic craft paint, it needs a better surface to stick to rather than plastic.  Spray them and let dry. You will probably have to spray half the egg, let it dry, then return later to spray the other half.


I used a craft paint brush to dab on a light blue acrylic craft paint to the eggs once the primer was dry. I did half of the egg, set it down to dry and came back later to paint the other half of the egg. Once the eggs were completely painted blue (I did a touch up layer once both sides were dry), I used a toothpick to dot on a few brown speckles. I also used a craft water-based acrylic paint for the speckles. Then finally and very importantly I used a clear acrylic spraypaint on the eggs once the blue pint and brown speckles were dry. If this clear coat isn't sprayed on, the acrylic craft paint will simply fleck off if anything comes into contact with it and it will run and smear if it gets wet (in the rain or snow). The clear coat serves as protection.  Now take a moment to admire your fabulous robin's eggs.  


In the meantime while all the drying was taking place, I planned to make a trip to Michael's to look for a nest. After getting my daughter fed, dressed, packed up and bundled up, we got out to the car only to find a dead car battery. Turns out one of my boys left the light on in the car the previous day. Awesome! 


Making a Nest...So we went back inside and I was forced to make due with what I already had on hand. I made the trip down the basement steps once again and noticed a bag of long strands of raffia. I also contemplated gathering twigs in the backyard and making a nest that way.


With a little coercing I was able to craft a perfect little nest. I simply started with a few strands of raffia and wound them around and kept adding a few more strands. Use very small dabs of hot glue here and there to help hold the nest together.


Stella, my hot glue gun, has burned me once or twice. Please be so careful.


Lastly I used brown spray paint to give the nest a more natural color and one that coordinated better with what I was envisioning. Once it was dry I used Stella to glue the robin's eggs into the nest. Insert smile here - this makes me happy.


When I went back downstairs to my basement (yet again) to check on the drying paint, I found a grapevine wreath.

My intent was to spraypaint the wreath a cream/neutral color but was unable to locate my cream-colored spraypaint.


So instead I used an old can of Behr indoor house paint in a similar color. I used the oldest and cheapest paint brush I could find.

Since the wreath is already textured on its own, I didn't need to worry about a perfect finish. I dabbed and squished paint onto every surface I could reach.


After several hours when the paint was mostly dry, I flipped the wreath over and did the same thing. Don't worry if you can't cover every millimeter of the wreath's surface. This just gives depth and adds to its character when the dark brown shows through a little.


To make the fabric flowers...I used a cream-colored polyester apparel lining fabric I found in my "stash". For my pictures I used colored fabric for ease of seeing what I was doing.

Cut similar-sized circles. I used about 40. They do not need to be perfect (notice the wrinkles, fraying and irregular shapes of my circles). Once you have them cut out, you will use your hot glue gun to turn flat circles into fabulous flower buds.


First put a bead of glue near the center of the flower. Fold the flower in half and press down gently where the glue dot is. Be careful because this is a great way to burn yourself if the glue seeps through the fabric.


Next on the flat side of the semi-circle run a thin line of glue parallel to the flat surface.


Fold the right 1/3 of the flower towards the left, then fold the left 1/3 of the flower towards the right.


Pat down with your fingers so the glue adheres well. Again watch out for hot seeping glue.


When you pick up the flower, it should look something like this.


Do this with all of the circles you cut out. I cut out about 20 originally. Then cut and added more until the wreath looked the way I wanted it to.


Once they are done you can glue them onto your wreath. I first figured out where I wanted to glue the nest. Then I clustered the blossoms thickest near the nest and spread them thinner and farther from each other as I got farther from the nest.


When your blossoms are done, glue on your nest.

Go ahead and take a moment to admire your project. Mine took me about an hour and a half in total work time. I used only items I had on hand so it didn't end up costing me anything. Gotta love that!


And finally a photo of the wreath hanging on my front door. 


Maybe you could use a hint of spring on your front door. Maybe you just want to see what I'll come up with next. Please become a follower of my blog and feel free to invite friends and family to join if they might enjoy it as well.  If you use any of my ideas above, please do not portray my work as your own. All photos are copyrighted so they cannot be used without my permission.  I'd love to see photos of your spring wreath and hear your comments.