Thursday, December 1, 2011

Fraser Fir Monogram Wreath

Every year I make my own wreath for my front door. The Saturday after Thanksgiving, our family goes out and cuts down their Christmas trees and I scrounge around collecting branches from the bottom layers of the trees. I brought home a garbage bag full of white pine, Fraser fir and scotch pine boughs.

My husband took a few wire dry cleaning hangers and used them to fashion a "C".
Honestly I could have done this myself but it is always fun to put him to work.


Next use garden clippers or pliers to clip sections of your pine tree boughs. Layer the clumps on top of each other until you get a thick enough clump. This is probably about four sections of the boughs. I used a mixture of mostly Fraser fir because I had the most of it and also white pine and Scotch pine.


Use green floral wire and wrap it around the ends of the boughs several times.


Then set the clump at the top edge of the wire letter and wrap the wire several times around the wire. There is no need to clip the wire until you have completed wrapping clumps of pine to the wire letter. Make sure to wrap each new section of pine as close as possible to the section you just wired. This will help to keep the wreath nice and full.


It took me about an hour to finish mine. Since I can rarely resist something shiny and glittery, I picked these up during my weekly visit to my local Target.


At first I used them to do this...


and it bored me to tears. So I broke out some fab new red burlap and re-constructed my wreath.


I like it much better now. In case you are wondering, I used 4 inch pieces of floral wire to attach each bulb to the wreath. First slide the wire through the hook at the end of the bulb. Twist the buld end around the middle of the a few times to hold it on. Then decide where you want the ornament to hang and twist the wire around a section of the wreath.


After I finished this version, I still wasn't totally happy so I went to work on it again. I clustered three bulbs together and hot glued them together. Then I once again used the floral wire to connect the cluster of bulbs to the wreath.


That's it. I've read that you should spritz your wreath with water once a day in order to keep your wreath looking fresh longer. Must. Remember. After viewing my pictures, I also must remember to get a manicure. Working with pine is a little rough on the digits.


I am partying at:

shabby creek cottage Somewhat Simple The Shabby Nest

Sunday, October 30, 2011

Going Pink for a Cause


One Day, as many bloggers as possible, painting our blogs P I N K
for an incredible cause "Breast Cancer Awareness".

Pretty in Pink

A fabulous friend brought over this fabric for me to have fun with.


Here it is in a single layer.


I used my rotary cutter and cut off about a 4-inch strip cutting from selvage edge to selvage edge. Once done, I cut the length of the strip in half.

I read recently about being able to use a sewing machine to make gorgeous ruffles.


Set your tension all the way up (mine is at 9). Use a long running stitch - I set mine at 5 mm.


Take your strip of fabric and fold it in half. I chose to sew mine along the folded edge.


A trick I learned in a sewing class a while back was that when ruffling, lay your hand against the back of the machine so the fabric pushed against it as it runs under the presser foot. This will add to the ruffling effect.


Here is the ruffle hot off the sewing machine. Trim your threads and heat up your hot glue gun.


Use small dabs of glue (be careful it does tend to seep though mesh or sheer fabric and that glue is hot, hot, hot) and roll the fabric up forming a flower.


It should look a little something like this. Cut out a circle of felt and hot glue it to the back of the flower. Lastly, hot glue a pin back.


Another option is to use the ruffle flowers to make a cute headband.


I first attached mine to the elastic headband using Fabri-Tac. Then I cut out a double circle of felt and attached both flowers and the headband to the felt also using Fabri-Tac.


You can even embellish them by sewing beads or pearls into the flowers. It took me all of about 20 minutes to make both items.


This project linked up at:

Monday, October 17, 2011

Fall is a Great Time for Felting

This new post is for you Dee Dee. She has noticed my blog absence and has requested (on many occasions) new posts.

My friend Carly got me into felting two years ago. I have always loved wool. Now I love it even more because I enjoy the possibilities of what I can turn a tired old sweater into.

After rummaging through tubs of old wool sweaters from college, I was armed with just what I needed for this project. I began felting the wool sweaters by washing them in the washing machine on hot. Once the load was complete, I dried them in the clothes dryer on hot for a full cycle. Most of the sweaters turned out perfect. Then there was this one...


Seriously it was a disaster. I had originally planned on making a sweater jumper for my 18-month-old daughter and had to come up with a new plan for this mess. I stared at it for months and finally got an idea. I turned the sweater inside out and the wool wasn't as pilly and looked a million times better. I cut the usable wool down to a square size and decided to make a fun felted wool purse.

After cutting, I turned the wool so the pilly part was on the outside and hand-stitched the two sides of the purse together. The bottom part of the purse was the fold and the top was left open to insert a lining and handle for the purse. Felting this wool caused it to get really thick and when both sides were sewn together I was sewing through a full inch thickness of fabric - unfortunately my sewing machine was unable to handle that. I had a gorgeous callus on my finger for quite some time.


Next I made a lining and eventually added a cell phone pocket. I inserted the lining into the purse (after turning it so the pretty side was on the outside) and had to hand stitch the lining to the wool all the way around the opening.


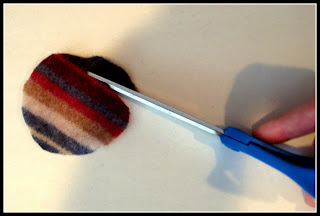
I then cut out a bunch of circles from other wool felt I had made.


Cut each circle into a giant spiral (see below).


Once cut, hot glue around in a circle to form a flower.


I did enough flowers to cover the perimeter of the opening of the little purse. 


Last I added a felted wool handle.


And done! I will probably go back and add a magnetic snap closure but doing so will require me to tear away half of the lining, add in the snap and then re-sew the lining to the wool.


I love fall. I love felting. Fall is a great time to repurpose an old wool sweater or make a trip to a second-hand shop to pick up some fabulous wool to cut up and make into something you love.


This project is entered in an Upcycle contest. Please click on the botton below to vote for my Upcycled Felt Purse.


This project is linked up at:

UndertheTableandDreaming homework
Photobucket


Passionately Artistic
Somewhat Simple The Shabby Nest I heart Naptime UndertheTableandDreaming